Wiki: How to Install a Virtual Machine and an Operating System
Written and created by Lauren Grassano, Ariel Ynovy, & Andrew Pannelli
Using a virtual machine can be a necessary subject these days. With Linux and Mac growing in popularity, learning to code for those platforms is of importance. Testing software to be cross-platform is important. Also, if you need to learn how to deploy a server without altering your own machine, a virtual instance of a operating system is the way to go.
Using a virtual machine can be a necessary subject these days. With Linux and Mac growing in popularity, learning to code for those platforms is of importance. Testing software to be cross-platform is important. Also, if you need to learn how to deploy a server without altering your own machine, a virtual instance of a operating system is the way to go.
We are going to show you step by step how to create a virtual machine using VMWare, one of the most popular virtual machine software in the business, along with Ubuntu, easily the most recognizable Linux distributions on the market.
Linux is a kernel, or back end , the code, of an operating system. Then along with several other parts, the OS comes together. The most recognizable manner which everyone knows their favorite distribution, or distro, is by the desktop environment. Desktop environments are the Graphical User Interfaces' that we use to access the programs on our operating system. Some of the most popular ones on Linux are KDE, GNOME, LXDE, and XFCE. Even Microsoft has a GUI, its called Windows. Apple used to called their GUI Aqua, but really just refer to the whole OS now as MacOS.


MacOS GNOME
Windows
Step 1.

Start your computer and open your Internet browser
Step 2.

In this case we are using Chrome and Google for the search engine. You can use any of your choice, just be aware of where your downloads are going in future steps.
Step 3.

Search for VMWare.com - only download from official sites.
Step 4.

On the VMware homepage, hover over Downloads and click on Workstation Player.
Step 5.


On the Workstation Player page, scroll down to the bottom of the page and click on Download for Windows 10.
Step 6.

When your download has finished click open the file and click Install.
Step 7.

Click next when asked.
Step 8.

Accept the License Agreement and click Next.
Step 9.

Unless you know you need the Enhanced Keyboard Drivers, yuou can ignore this and click Next.
Step 10.

You can join in the user experience if you wish, we did not. Click Next.
Step 11.

Choose where you want to have shortcuts made. Click Next.
Step 12.

This is one of the final steps. Click Install.
Step 13.

VMWare will install on your computer now. Sit back and wait.
Step 13.

At the splash screen Click Finish.
Step 14.

If you are using this at home and not for comercial use, Click Continue.
Step 15.

Click Finish.
Step 16.

Congratulations, you have installed Workstation Player. You can go ahead and either minimize it or close it out, but you'll be bringing it back up later.
Section 2 - Downloading and installing Ubuntu
Step 1.

Head back to your Internet browser and search Ubuntu.com. Again, only download files you trust.
Step 2.

Click on Downlaods. CHoose which version of Ubuntu you want. We'll be using Ubuntu 19.10.
Step 3.

Once you have downloaded the ISO file, save it somewhere you can find it. We suggest creating a folder in your Documents called ISOs, this will aid you in easily finding the file later on.
Step 4.

Go back and open your Workstation Player again. THis is where we'll be working from. Click on Create a new Virtual Machine.
Step 5.

In the box that pops up, Click on Browse. Navigate to wherever it is that you stored your Ubuntu ISO. Click Next.
Step 6.

Step 7.

Choose a name for the virtual machine. We recomend nameing it something that differeentiates it from any other Linux installs you may install later on.
Step 8.

Step 9.

In the next step, you'll need to Customize the Hardware.
Step 10.

Step 11.

Click Finish.
Step 12.

The VM will start installinging now.
Step 13.


Step 14.

If you get to this screen where it is just stuck in a loop, simply navigate to the button next to the one labled Player. It is the one that looks like a Pause sign. Open it and click Restart.
Step 17.

CLcik on your profile and then you'll be promted to enter your password.
Step 18.

Congratulations, you have successfully installed your first operaating system. You'll need to install updates when prompted.
Step 19.

In the following tutorial, we will show you how to download and install virtual machine software alongside installing a Linux desktop. You are going to be using VMWare Workstation Player and Ubuntu 19.10, the latest version of Ubuntu. This is a bit of a lengthy wiki, as we are going to show you each step, one at a time, so you'll have no questions at the end. Once done, using the easy mode that comes with VMWare, you'll have third party codecs installed and VMWare Tools so that you can go full screen and work like your on a proper desktop.
This tutorial is designed for Windows 10 users who want or need to use Linux, specifically Ubuntu , maybe for work or just out of curiosity. This is not designed to tell users how to use Ubuntu or diagnose any issues one might have with their installation.
Always back up your hard drive when doing something you are not familiar with and make sure that you are getting files from trusted sources.
That all being said, lets begin:
Step 1.

Start your computer and open your Internet browser
Step 2.

In this case we are using Chrome and Google for the search engine. You can use any of your choice, just be aware of where your downloads are going in future steps.
Step 3.

Search for VMWare.com - only download from official sites.
Step 4.

On the VMware homepage, hover over Downloads and click on Workstation Player.
Step 5.


On the Workstation Player page, scroll down to the bottom of the page and click on Download for Windows 10.
Step 6.

When your download has finished click open the file and click Install.
Step 7.

Click next when asked.
Step 8.
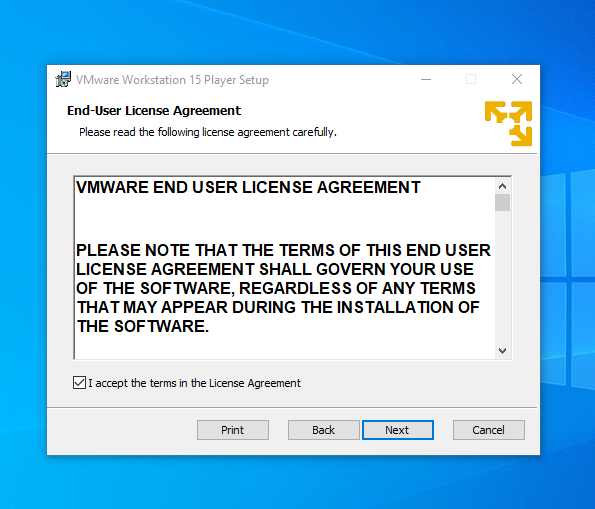
Accept the License Agreement and click Next.
Step 9.

Unless you know you need the Enhanced Keyboard Drivers, yuou can ignore this and click Next.
Step 10.

You can join in the user experience if you wish, we did not. Click Next.
Step 11.

Choose where you want to have shortcuts made. Click Next.
Step 12.

This is one of the final steps. Click Install.
Step 13.

VMWare will install on your computer now. Sit back and wait.
Step 13.

At the splash screen Click Finish.
Step 14.

If you are using this at home and not for comercial use, Click Continue.
Step 15.

Click Finish.
Step 16.

Congratulations, you have installed Workstation Player. You can go ahead and either minimize it or close it out, but you'll be bringing it back up later.
Section 2 - Downloading and installing Ubuntu
Step 1.

Head back to your Internet browser and search Ubuntu.com. Again, only download files you trust.
Step 2.

Click on Downlaods. CHoose which version of Ubuntu you want. We'll be using Ubuntu 19.10.
Step 3.

Once you have downloaded the ISO file, save it somewhere you can find it. We suggest creating a folder in your Documents called ISOs, this will aid you in easily finding the file later on.
Step 4.

Go back and open your Workstation Player again. THis is where we'll be working from. Click on Create a new Virtual Machine.
Step 5.

In the box that pops up, Click on Browse. Navigate to wherever it is that you stored your Ubuntu ISO. Click Next.
Step 6.

This is an important step. Type your name. In User name though, you need to write it with all lower case letters, as Linux only accepts lowercase letters in the root file sytstem, this is similar to your C drive in Windows.
Step 7.

Choose a name for the virtual machine. We recomend nameing it something that differeentiates it from any other Linux installs you may install later on.
Step 8.

Here, you need to choose how much space to allow your virtual machine to have. They recommend 20GB, but we recommend a minimum of 30GB if your hard drive has enough available. This is not virtual, this is actually going to take this much of your physical hard drive, so be aware.
Also, in this step, we recommend changing the disk to one virtual disk rather than a split disk. THis will help your install run slightly faster and smoother. Click Next
Step 9.

In the next step, you'll need to Customize the Hardware.
Step 10.

Here, we need to navigate to Processors, choose 2 processors. While most Linux distrobutions don't require much to run, you'll need to give it a couple processors so it can multitask better. If you can give it more, great. Also, While you're here if you have enough Memory, give it at least 4096MB, or 4GB. We have only given it 2GB as it is all we have on this machine to spare. Click Close.
Step 11.

Click Finish.
Step 12.

The VM will start installinging now.
Step 13.


Once it starts installing, you have up to 30 minutes or even more, depending on your computer and processor. There will be several spaslsh screens that will give you information about Ubuntu and where you can get help.
Step 14.

If you get to this screen where it is just stuck in a loop, simply navigate to the button next to the one labled Player. It is the one that looks like a Pause sign. Open it and click Restart.
Step 17.

CLcik on your profile and then you'll be promted to enter your password.
Step 18.

Congratulations, you have successfully installed your first operaating system. You'll need to install updates when prompted.
Step 19.

When you are done with the updates, explore around the settings. We recommend moving the application dock from the side to the bottom and making it slightly smaller.
Good luck on your new journey in Linux and with Ubuntu. Comment about your trial with the installation! Let us know how it went!
BONUS: Below we linked a couple videos to show you other ways of installing. We showed you the Easy Install way that comes in Workstation Player 15.5. If the Easy Install does not work for you, check out the videos below and see if that helps.
‘‘An easy and Elegant Way to Use Your Computer, GNOME 3 Is Designed to Put You In Control and Get Things Done.’’ GNOME, https://www.gnome.org/
‘‘Laptop Cartoon - Unlimited Download. Cleanpng.com.’’ Cleanpng.com,
https://www.cleanpng.com/png-laptop-windows-10-computer-clearone-910-154-055-
1793210/download-png.html
Jha, Shailesh. “Shailesh Jh.” How to Install VMware Workstation 15 Pro (2020) on Windows 10, 11 Feb. 2020, www.shaileshjha.com/how-to-install-vmware-workstation-12-pro-on-windows-10/.
Bagci, tolgabagciTogla. “How to Install VMware Workstation 15.5.0 on Windows 10.” Tolga Bagci, 26 Sept. 2019, www.tolgabagci.com/en/install-vmware-workstation-pro-windows-10/.

Comments
Post a Comment